
How to Learn Revit: Step-by-Step Guide for Beginners
Learning Revit can feel difficult in the beginning, especially if you are coming from AutoCAD, SketchUp, or manual drafting. Many beginners try to learn Revit by randomly watching videos, copying commands, or jumping directly into modelling without understanding how Revit actually works. This often leads to confusion.
The best way to learn Revit is not to memorise commands. The best way is to understand the Revit workflow step by step.
Revit is not only a drawing software. It is a Building Information Modelling platform. This means that when you create walls, doors, windows, floors, rooms, stairs, schedules, views, and sheets, you are not simply drawing lines. You are building a coordinated digital model from which drawings and information can be generated.
This guide explains how to learn Revit in a structured way. It is written for architecture students, fresh graduates, interior designers, architects, engineers, and professionals who want to move from CAD-based drafting to a BIM-based workflow.
By the end of this article, you will understand the correct learning sequence for Revit, what to practise first, what mistakes to avoid, and how to build confidence through a small project-based approach.
Why Revit Feels Difficult in the Beginning?
Revit feels difficult because it requires a different way of thinking.
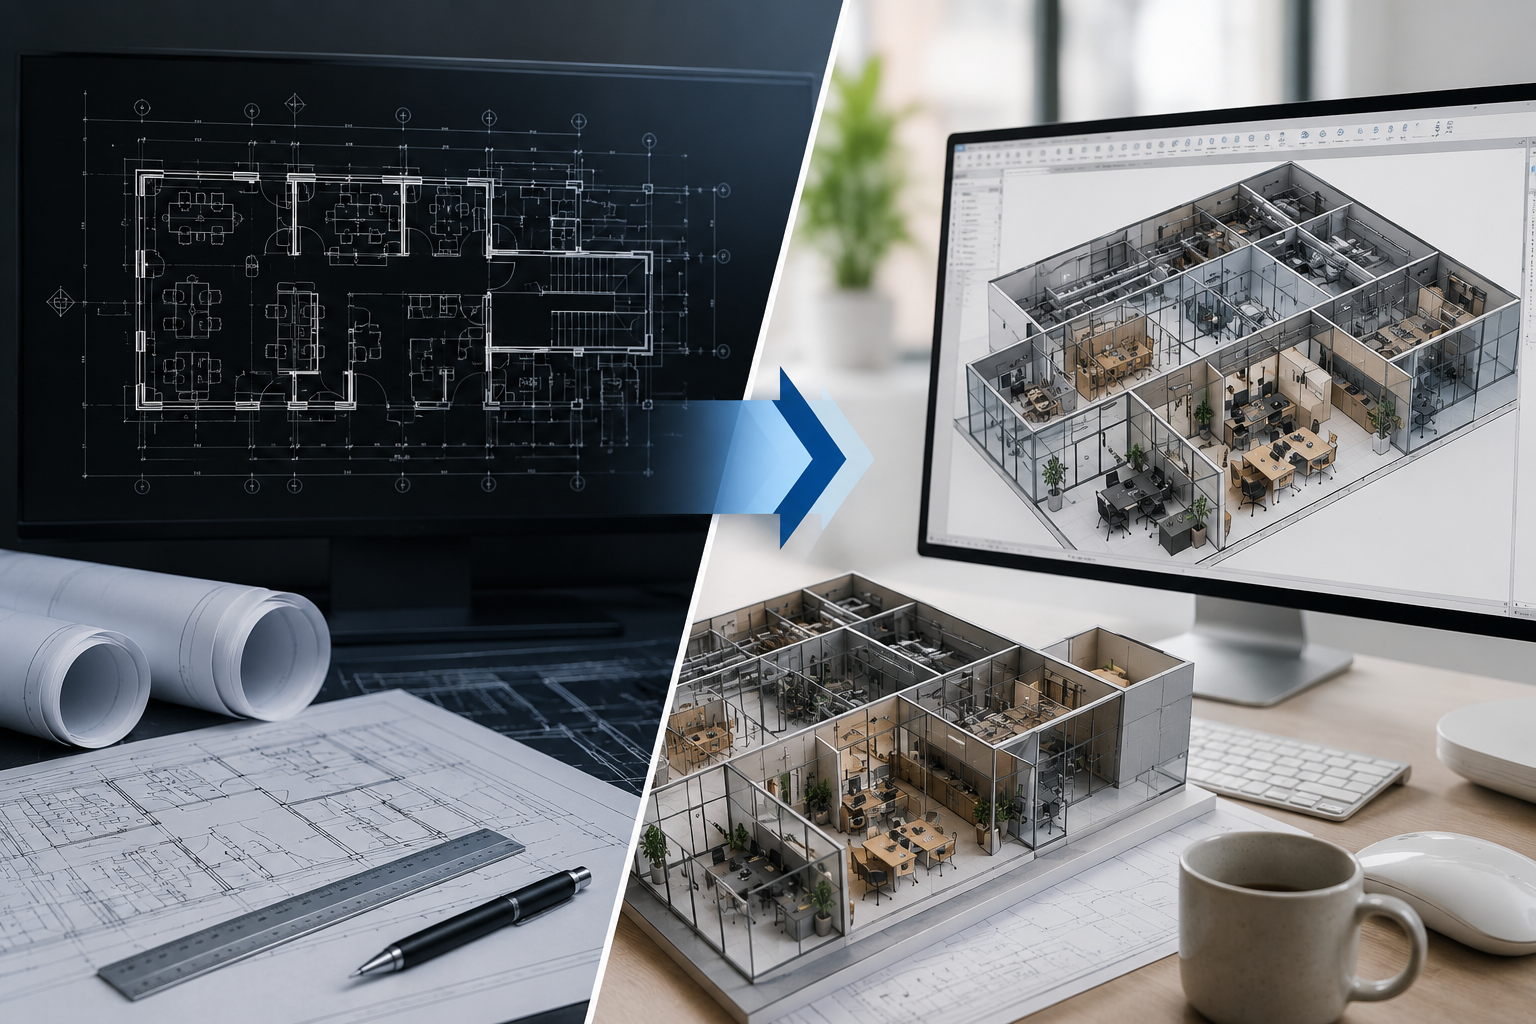
In AutoCAD, you usually draw lines, polylines, hatches, text, dimensions, and blocks. The drawing is mostly a 2D representation. In Revit, you create building elements. A wall is not just two lines. A door is not just a block. A room is not just a label. These objects contain information and are connected to views, schedules, sheets, and documentation.
This is why many beginners struggle when they try to use Revit like CAD.
For example, in CAD you may draw a wall in plan using offset lines. In Revit, you place an actual wall element with height, level, type, material, and constraints. In CAD, you may manually draft elevations. In Revit, elevations can be generated from the model. In CAD, door schedules are often typed manually. In Revit, door schedules can be generated from model data.
This shift from drafting to modelling is the most important concept to understand when learning Revit.
The Right Mindset Before Learning Revit
Before learning Revit tools, you need to develop the right mindset.
Do not think of Revit as a faster version of AutoCAD. Revit is not only about speed. It is about coordination, consistency, information, and project control.
When learning Revit, keep these points in mind:
- You are creating a building model, not just drawings.
- Plans, sections, elevations, schedules, and sheets are connected.
- Changes in the model can update across multiple views.
- Element properties are as important as geometry.
- Good modelling habits are important from the beginning.
- A clean project structure matters.
- Documentation should be developed from the model wherever possible.
Once you understand this, Revit becomes easier to learn.
Step 1: Understand the Revit Interface
The first step in learning Revit is understanding the interface. Do not start with walls and doors immediately. Spend some time learning where things are located.
The main parts of the Revit interface are:
- Ribbon
- Architecture tab
- Modify tab
- Properties Palette
- Project Browser
- Drawing Area
- Type Selector
- Options Bar
- View Control Bar
- Status Bar
- Navigation Bar
- ViewCube
The Ribbon contains the main tools. The Properties Palette shows information about the selected object or active view. The Project Browser helps you open floor plans, elevations, sections, 3D views, schedules, and sheets. The Drawing Area is where you work. The View Control Bar controls view scale, detail level, visual style, and visibility settings.
A beginner should become comfortable with these interface elements before starting a full project.
What to Practise First in the Interface
Open a sample project or a new architectural template and practise the following:
- Open a floor plan from the Project Browser.
- Open a 3D view.
- Select a wall and observe the Properties Palette.
- Change the view scale from the View Control Bar.
- Use the ViewCube in a 3D view.
- Zoom, pan, and orbit.
- Open an elevation view.
- Open a sheet, if available.
- Switch between multiple views.
- Understand where the Architecture and Modify tools are located.
This basic familiarity will make the next steps much easier.
Step 2: Learn Levels and Grids
After understanding the interface, learn levels and grids.
Levels are horizontal reference planes that define building storeys. For example, you may have Ground Floor, First Floor, Second Floor, Terrace, and Roof Level. Walls, floors, columns, stairs, and many other elements are usually related to levels.
Grids are reference lines used to organise the structural and planning layout. They help position columns, walls, and major building elements.
Many beginners ignore levels and grids and start modelling directly. This is a mistake. If levels are not understood properly, the model becomes difficult to control later.
Why Levels Are Important
Levels control the vertical organisation of a building. If a wall is placed from Ground Floor to First Floor, its height is controlled by level constraints. If the level height changes, properly constrained walls can update accordingly.
This is one of the key advantages of Revit. Instead of manually editing every wall height, you can use levels and constraints to manage the model more intelligently.
Step 3: Learn Basic Modelling Tools
Once you understand the interface, levels, and grids, start learning basic modelling tools.
Begin with the following:
- Walls
- Doors
- Windows
- Floors
- Roofs
- Ceilings
- Columns
- Stairs
- Railings
- Components
- Rooms
Do not try to learn advanced tools immediately. First, create a simple room, then a small house, then a slightly larger building.
The objective is to understand how model elements behave.
Start with Walls
Walls are one of the best tools to start with because they help you understand many Revit concepts.
When learning walls, practise:
- Drawing straight walls
- Drawing rectangular rooms
- Changing wall types
- Changing wall height
- Using location line
- Using temporary dimensions
- Aligning walls
- Trimming and extending walls
- Creating internal partitions
- Viewing walls in 3D
This teaches you modelling, selection, properties, and modification in one simple exercise.
Add Doors and Windows
After creating walls, add doors and windows. This helps you understand hosted elements. Doors and windows are usually hosted by walls, which means they depend on the wall in which they are placed.
Practise the following:
- Place doors in walls
- Change door size using the Type Selector
- Move doors accurately
- Place windows
- Adjust window sill height
- View doors and windows in plan, elevation, and 3D
This helps you understand how one model element affects different views.
Step 4: Learn Views Before Sheets
Many beginners want to create sheets quickly, but before learning sheets, you must understand views.
In Revit, views are different ways of looking at the same model. Common views include:
- Floor plans
- Ceiling plans
- Elevations
- Sections
- 3D views
- Drafting views
- Schedules
- Legends
A floor plan, section, elevation, and 3D view are not separate drawings. They are different views of the same model.
This is very important. If you move a door in plan, it changes in elevation and 3D. If you change a wall, it updates wherever that wall is visible.
Learn View Settings
Every Revit view has its own settings. These settings control how the model appears in that view.
Important view settings include:
- View scale
- Detail level
- Visual style
- Crop region
- View range
- Visibility/Graphics
- Discipline
- Phase
- Underlay
- View template
For beginners, view scale, detail level, crop region, and visual style are the most important settings to start with.
Why You Should Learn How to Learn Revit Properly
Many beginners fail to make progress in Revit because they start in the wrong way. They open the software, watch a few videos, draw some walls, place a few doors, and then get stuck when they need to create sections, elevations, schedules, or sheets.
This happens because Revit is not a command-based drafting tool. It is a project-based modelling and documentation platform.
When you learn Revit properly, you understand the relationship between:
- Model elements
- Levels and grids
- Views
- Properties
- Annotations
- Schedules
- Sheets
- Drawing output
This relationship is the foundation of Revit.
If you only learn isolated commands, you may know how to draw a wall but not understand how that wall appears in plan, section, elevation, 3D view, schedule, and sheet. If you learn Revit as a complete workflow, you begin to understand how design and documentation are connected.
That is why the first question should not be only “Which Revit command should I learn?” The better question is: How to learn Revit in the right sequence?
How to Learn Revit Without Using It Like AutoCAD
One of the biggest mistakes beginners make is trying to use Revit like AutoCAD.
In AutoCAD, you usually draw lines, polylines, hatches, text, dimensions, and blocks. The drawing is mostly a 2D representation. In Revit, you create building elements. A wall is not just two lines. A door is not just a block. A room is not just a label. These objects contain information and are connected to views, schedules, sheets, and documentation.
For example, in CAD you may draw a wall in plan using offset lines. In Revit, you place an actual wall element with height, level, type, material, and constraints.
In CAD, you may manually draft elevations. In Revit, elevations can be generated from the model.
In CAD, door schedules are often typed manually. In Revit, door schedules can be generated from model data.
This shift from drafting to modelling is the most important concept to understand when learning Revit.
If you are moving from CAD to Revit, do not ask, “Where is the CAD command in Revit?” Instead, ask, “What is the Revit way of doing this?”
How to Learn Revit with the Right Mindset
Before learning Revit tools, you need to develop the right mindset.
Do not think of Revit as a faster version of AutoCAD. Revit is not only about speed. It is about coordination, consistency, information, and project control.
When learning Revit, keep these points in mind:
- You are creating a building model, not just drawings.
- Plans, sections, elevations, schedules, and sheets are connected.
- Changes in the model can update across multiple views.
- Element properties are as important as geometry.
- Good modelling habits are important from the beginning.
- A clean project structure matters.
- Documentation should be developed from the model wherever possible.
Once you understand this, Revit becomes easier to learn.
The goal is not only to create a good-looking 3D model. The goal is to create a model that can support design development, documentation, schedules, and coordinated drawing production.
Step 1: How to Learn Revit Interface Basics
The first step in learning Revit is understanding the interface. Do not start with walls and doors immediately. Spend some time learning where things are located.
The main parts of the Revit interface are:
- Ribbon
- Architecture tab
- Modify tab
- Properties Palette
- Project Browser
- Drawing Area
- Type Selector
- Options Bar
- View Control Bar
- Status Bar
- Navigation Bar
- ViewCube
The Ribbon contains the main tools. The Properties Palette shows information about the selected object or active view. The Project Browser helps you open floor plans, elevations, sections, 3D views, schedules, and sheets. The Drawing Area is where you work. The View Control Bar controls view scale, detail level, visual style, and visibility settings.
A beginner should become comfortable with these interface elements before starting a full project.
How to Learn Revit Interface by Practising Navigation
Open a sample project or a new architectural template and practise the following:
- Open a floor plan from the Project Browser.
- Open a 3D view.
- Select a wall and observe the Properties Palette.
- Change the view scale from the View Control Bar.
- Use the ViewCube in a 3D view.
- Zoom, pan, and orbit.
- Open an elevation view.
- Open a sheet, if available.
- Switch between multiple views.
- Understand where the Architecture and Modify tools are located.
This basic familiarity will make the next steps much easier.
Many beginners waste time because they do not know where views are stored, how to change properties, or how to return to a floor plan. Once navigation becomes comfortable, Revit feels less intimidating.
Step 2: How to Learn Revit Levels and Grids
After understanding the interface, learn levels and grids.
Levels are horizontal reference planes that define building storeys. For example, you may have Ground Floor, First Floor, Second Floor, Terrace, and Roof Level. Walls, floors, columns, stairs, and many other elements are usually related to levels.
Grids are reference lines used to organise the structural and planning layout. They help position columns, walls, and major building elements.
Many beginners ignore levels and grids and start modelling directly. This is a mistake. If levels are not understood properly, the model becomes difficult to control later.
Levels control the vertical organisation of a building. If a wall is placed from Ground Floor to First Floor, its height is controlled by level constraints. If the level height changes, properly constrained walls can update accordingly.
This is one of the key advantages of Revit. Instead of manually editing every wall height, you can use levels and constraints to manage the model more intelligently.
How to Learn Revit Levels Through a Simple Exercise
Create a simple project with three levels:
- Ground Floor
- First Floor
- Terrace
Then create walls on the Ground Floor and constrain them up to the First Floor. Change the First Floor height and observe how the wall height responds.
This exercise teaches an important Revit concept: model elements are not isolated drawings. They are controlled by relationships.
Once you understand levels, you will find it easier to create multi-storey buildings, sections, elevations, stairs, and coordinated views
Step 3: How to Learn Revit Basic Modelling Tools
Download the Free Revit Beginner Learning Checklist
Use this checklist to follow the correct Revit learning sequence and avoid common beginner mistakes.
Begin with the following:
- Walls
- Doors
- Windows
- Floors
- Roofs
- Ceilings
- Columns
- Stairs
- Railings
- Components
- Rooms
Do not try to learn advanced tools immediately. First, create a simple room, then a small house, then a slightly larger building.
The objective is to understand how model elements behave.
How to Learn Revit by modelling Walls First
Walls are one of the best tools to start with because they help you understand many Revit concepts.
When learning walls, practise:
- Drawing straight walls
- Drawing rectangular rooms
- Changing wall types
- Changing wall height
- Using location line
- Using temporary dimensions
- Aligning walls
- Trimming and extending walls
- Creating internal partitions
- Viewing walls in 3D
This teaches you modelling, selection, properties, and modification in one simple exercise.
A wall in Revit has type, height, level, location line, constraints, and materials. When you select a wall and look at the Properties Palette, you begin to understand how Revit stores information inside model elements.
How to Learn Revit Doors and Windows
After creating walls, add doors and windows. This helps you understand hosted elements. Doors and windows are usually hosted by walls, which means they depend on the wall in which they are placed.
Practise the following:
- Place doors in walls
- Change door size using the Type Selector
- Move doors accurately
- Place windows
- Adjust window sill height
- View doors and windows in plan, elevation, and 3D
This helps you understand how one model element affects different views.
For example, when you place a window in a wall, you can see it in plan, elevation, section, and 3D. This is where the Revit workflow starts to become clear. You are not drawing four separate representations. You are placing one model element that appears in multiple views.
Step 4: How to Learn Revit Views Before Sheets
Many beginners want to create sheets quickly, but before learning sheets, you must understand views.
In Revit, views are different ways of looking at the same model. Common views include:
- Floor plans
- Ceiling plans
- Elevations
- Sections
- 3D views
- Drafting views
- Schedules
- Legends
A floor plan, section, elevation, and 3D view are not separate drawings. They are different views of the same model.
This is very important. If you move a door in plan, it changes in elevation and 3D. If you change a wall, it updates wherever that wall is visible.
How to Learn Revit View Settings
Every Revit view has its own settings. These settings control how the model appears in that view.
Important view settings include:
- View scale
- Detail level
- Visual style
- Crop region
- View range
- Visibility/Graphics
- Discipline
- Phase
- Underlay
- View template
For beginners, view scale, detail level, crop region, and visual style are the most important settings to start with.
If something is not visible in a view, do not immediately assume it is deleted. It may be hidden because of view range, crop region, visibility settings, discipline, phase, or detail level. Understanding views is essential for avoiding confusion.
Step 5: How to Learn Revit Annotation and Dimensions
After basic modelling and views, learn annotation tools.
Annotation is used to explain the model on drawings. It includes:
- Dimensions
- Text notes
- Tags
- Room tags
- Door tags
- Window tags
- Section marks
- Elevation marks
- Detail callouts
In Revit, annotation is view-specific. This means that a dimension placed in one floor plan does not automatically appear in every other view. This gives you control over drawing presentation.
How to Learn Revit Tags
Tags are different from plain text. A tag reads information from the model element.
For example, a door tag may display the door number. A room tag may display the room name and area. A window tag may display the window type.
This is why tags are important in BIM. They reduce manual typing and help maintain coordination between model data and drawings.
When learning tags, create a simple project with rooms, doors, and windows. Then tag them and check whether the tag information comes from the element properties. This exercise helps you understand the difference between manual drafting and model-based documentation.
Step 6: How to Learn Revit Rooms and Areas
Rooms are important for architectural planning, space programming, and schedules.
When you place rooms in Revit, you can assign room names, numbers, areas, departments, finishes, and other information depending on your project setup.
For beginners, rooms help connect design planning with documentation.
Practise the following:
- Place rooms
- Add room tags
- Rename rooms
- Renumber rooms
- Check room area
- Create a room schedule
- Understand room boundaries
This is especially useful for architects and interior designers because space planning is a major part of real projects.
Rooms also help you understand how Revit can store non-geometric information. A room is not only an enclosed space. It can carry information that can be used in schedules, finish plans, area calculations, and project documentation.
H2: Step 7: How to Learn Revit Schedules
Schedules are one of the biggest advantages of Revit.
A schedule is a table generated from model information. For example, you can create:
- Door schedule
- Window schedule
- Room schedule
- Furniture schedule
- Finish schedule
- Sheet list
- Drawing issue schedule
In CAD, many of these schedules are manually typed and updated. In Revit, schedules can be connected to the model.
The easiest schedule for beginners is a room schedule.
Create a small project with a few rooms and then create a room schedule showing:
- Room number
- Room name
- Area
- Level
This will help you understand how Revit converts model information into project data.
Once you understand room schedules, you can move to door schedules, window schedules, furniture schedules, and sheet lists.
Step 8: How to Learn Revit Sheets and Drawing Production
A sheet is used to compose drawings for presentation or construction documentation. You can place floor plans, sections, elevations, details, schedules, and legends onto sheets.
Practise creating:
- Sheet with floor plan
- Sheet with elevations
- Sheet with sections
- Sheet with door schedule
- Sheet with room schedule
- Sheet index
Learning sheets is important because Revit is not only about modelling. The final professional output is usually a coordinated drawing set.
Good sheet habits include:
- Use proper view names.
- Use proper sheet numbers.
- Keep drawing titles clear.
- Use consistent scales.
- Avoid duplicate confusing views.
- Check crop regions.
- Check annotation readability.
- Keep sheets clean and organised.
These habits will help you when you work on real projects.
How to Learn Revit Through a Small Practice Project
Do not start with a complex hospital, airport, mall, or large office. Start with a small building such as:
- One-room studio
- Small residence
- Two-bedroom apartment
- Small office layout
- Small training centre
- Small interior design project
A small project allows you to understand the full workflow without getting overwhelmed.
Create a beginner practice project with:
- 2 rooms
- 1 toilet
- 1 small pantry or kitchen
- Doors and windows
- Basic floor
- Basic ceiling
- Furniture
- Room tags
- Dimensions
- One section
- Four elevations
- One 3D view
- Room schedule
- Door schedule
- Two sheets
This project is small enough for a beginner but complete enough to understand the Revit workflow.
The goal is to complete the full cycle: model, view, annotate, schedule, sheet, and print. This is much better than learning only individual tools.
How to Learn Revit in the Correct Sequence
A good beginner learning sequence should look like this:
- Revit interface
- Project Browser and Properties Palette
- Levels and grids
- Walls, doors, windows, and floors
- Basic modification tools
- Views and view settings
- Sections and elevations
- Rooms and room tags
- Dimensions and annotation
- Schedules
- Sheets
- Printing and PDF export
- Basic project documentation
This sequence helps you build skill step by step.
Do not jump directly to advanced families, worksharing, Dynamo, rendering, or complex BIM coordination. Those topics are useful later, but they can confuse beginners if introduced too early.
Common Mistakes When Learning How to Learn Revit
Many beginners make the same mistakes while learning Revit.
Avoid these mistakes:
- Learning commands randomly without understanding workflow
- Using Revit like AutoCAD
- Ignoring levels
- Ignoring the Properties Palette
- Not understanding view scale
- Drawing on the wrong level
- Creating too many unnecessary views
- Not naming views properly
- Modelling too much detail too early
- Ignoring schedules
- Avoiding sheets until the end
- Not practising with a complete small project
The biggest mistake is learning only isolated commands. Revit should be learnt as a project workflow.
A beginner should always ask: “How does this tool fit into the complete project?” This question will help you build practical skill rather than only software familiarity.
H2: How to Learn Revit Faster with a Weekly Practice Plan
You can learn basic Revit more effectively if you follow a weekly practice plan.
A practical beginner path may look like this:
Week 1:
Interface, navigation, levels, grids, walls, doors, windows, and floors.
Week 2:
Rooms, furniture, sections, elevations, view scale, visual style, and crop regions.
Week 3:
Dimensions, tags, text notes, room schedules, door schedules, and sheet setup.
Week 4:
Complete a small project and export a basic drawing set as PDF.
This plan is simple, but it gives you a complete learning structure.
For professional use, the goal should not be only to “know Revit.” The goal should be to produce correct, coordinated, and readable drawings from a Revit model.
How to Learn Revit from YouTube Without Getting Confused
YouTube can be useful, but it should not be your only learning method.
The problem with random videos is that they often teach commands without a structured learning path. You may learn how to create a wall, but not understand levels. You may learn how to place doors, but not understand schedules. You may learn modelling, but not understand drawing production.
Use YouTube for support, but follow a structured project-based learning path.
The best method is:
- Learn the concept.
- Watch a demonstration.
- Practise immediately.
- Apply it in a small project.
- Create sheets and schedules.
- Review your mistakes.
- Repeat with a better project.
This method helps you convert passive watching into actual Revit skill.
How to Learn Revit as an Architecture Student
Architecture students should learn Revit as a design and documentation tool.
They should focus on:
- Creating plans quickly
- Testing design changes
- Understanding levels and sections
- Creating presentation views
- Creating sheets
- Creating room schedules
- Creating basic construction drawings
- Updating drawings when design changes happen
For students, Revit can be very useful during design studio, thesis, working drawings, and portfolio development.
Instead of redrawing plans, sections, and elevations again and again, students can use Revit to update connected views from a single model. This is especially helpful when design changes are frequent.
How to Learn Revit as a Working Professional
Working professionals should focus on accuracy, standards, documentation, and coordination.
They should learn:
- Template-based working
- View organisation
- Sheet setup
- View templates
- Annotation standards
- Schedules
- Worksharing basics
- Model checking
- Drawing issue workflow
- Office standards
For professionals, Revit is not only a modelling tool. It is a production and coordination platform.
A professional should learn how to create drawings that are readable, consistent, coordinated, and useful for project delivery. This requires more than knowing commands. It requires understanding project standards and documentation workflow.
Final Advice on How to Learn Revit
The best way to learn Revit is to follow a structured path and complete small projects. Do not jump randomly between advanced tools. Do not try to learn everything at once. Start with the interface, then levels, then basic modelling, then views, then annotation, then schedules, then sheets.
Revit becomes easier when you understand that everything is connected. The model, views, schedules, and sheets work together. This is the real power of Revit and BIM.
If you are a beginner, your first goal should be simple: create a small building model and produce a basic drawing set from it. Once you can do that, you will have a strong foundation for learning more advanced Revit workflows.
For students, architects, interior designers, and professionals moving from CAD to Revit, this structured approach will save time and reduce confusion.
Do not learn Revit as a list of commands. Learn it as a complete project workflow.
Frequently Asked Questions About How to Learn Revit
The best way to learn Revit is through a structured project-based method. Start with the interface, then learn levels, walls, doors, windows, views, annotations, schedules, and sheets. Apply everything in a small project.
If you are a complete beginner, start with the interface, Project Browser, Properties Palette, levels, grids, walls, doors, windows, and basic views. After that, learn annotation, schedules, and sheets.
Revit can feel difficult at first because it works differently from CAD. However, it becomes easier when you understand the workflow of model, views, schedules, and sheets.
Yes, you can learn Revit without knowing AutoCAD. In fact, beginners who start directly with Revit often understand the BIM workflow more clearly because they are not limited by CAD habits.
You can learn basic Revit modelling in a few days or weeks, but becoming confident with documentation, schedules, sheets, standards, and professional workflows takes regular practice.
You should first learn the Revit interface, Project Browser, Properties Palette, levels, grids, walls, doors, windows, and basic view navigation.
YouTube can help, but it should not be your only learning method. Random videos often teach commands without workflow. A structured project-based approach is better
Yes, Revit is useful for architecture students because it helps with plans, sections, elevations, 3D views, sheets, design changes, and basic construction documentation.
Yes, Revit is useful for interior designers for room layouts, furniture planning, reflected ceiling plans, interior elevations, finish schedules, and documentation.
Beginners should practise with a small project such as a one-room studio, small residence, small office, or simple interior layout. The project should include model elements, views, schedules, and sheets.

0 Comments